It has been quite a long time I’ve been thinking about creating a design with those very realistic shadows. This weekend I decided to give it a try. I started to think about what would be the best way, manually recreating that would be too much work. So I decided to try the 3D capabilities of Photoshop. It turned out to be the easiest and quickest way. The result was also very good.
So in this tutorial I will show you how to create a design with beautiful and dramatic shadows using the 3D in Photoshop CC. The process is very straightforward and it will take you less than 1 hour to achieve the same result.
Step 1
Open Photoshop and create a new document, I used 2880×1800 pixels for the size. After that add some letters or the text you want to apply the shadow. I used “ABDZ” using Futura Medium for the font.

Step 2
Go to 3D>New 3D Extrusion from Selected Layer. Then select the 3D layer. In the 3D panel select the Extrusion layer and then start editing the properties.
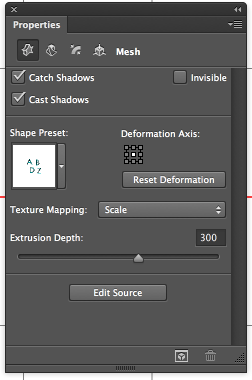
Step 3
For the…Read more